 An official website of the United States government.

How to Import an Excel File
The Excel (XLSX) format is the preferred format to submit a bulk Continuous Query enrollment, bulk One-Time query, or add records to your subject database.
Prepare your file
- Download the Excel file provided on the Import File for Enrollments , Import File for One-Time Query , or Import Subject Information pages. The file contains the following tabs:
Import File for New Enrollments
Import Subjects for One-Time Query
Import Subject Information
- Submission Data - A sheet to complete or use as a template to enter your practitioner records.
- Instructions - Example row and a list of instructions for entering your submission data.
- Action - Codes for the type of transaction you are submitting, an addition, deletion or update.
- Sex - Codes for the practitioner's sex.
- Organization Type - Codes for the type of organization.
- State - Two-letter codes for a state, territory, or military location.
- License Field - Codes for the practitioner's profession or field of licensure.
- License Specialty - Codes for a physician's or dentist's specialty.
- Enter your subject information into the spreadsheet. Limit each import file to 1,000 subjects.
- Save your file with a .xlsx extension. The Excel file extensions .csv and .xls are not accepted.
Note: See the instructions tab within the Excel file for details on how to complete each section properly.
Use your file
Submit a bulk Continuous Query enrollment
- Sign in to the NPDB.
- From the Select an Option page, select Query, then select Import File for Enrollments.
Select an Option

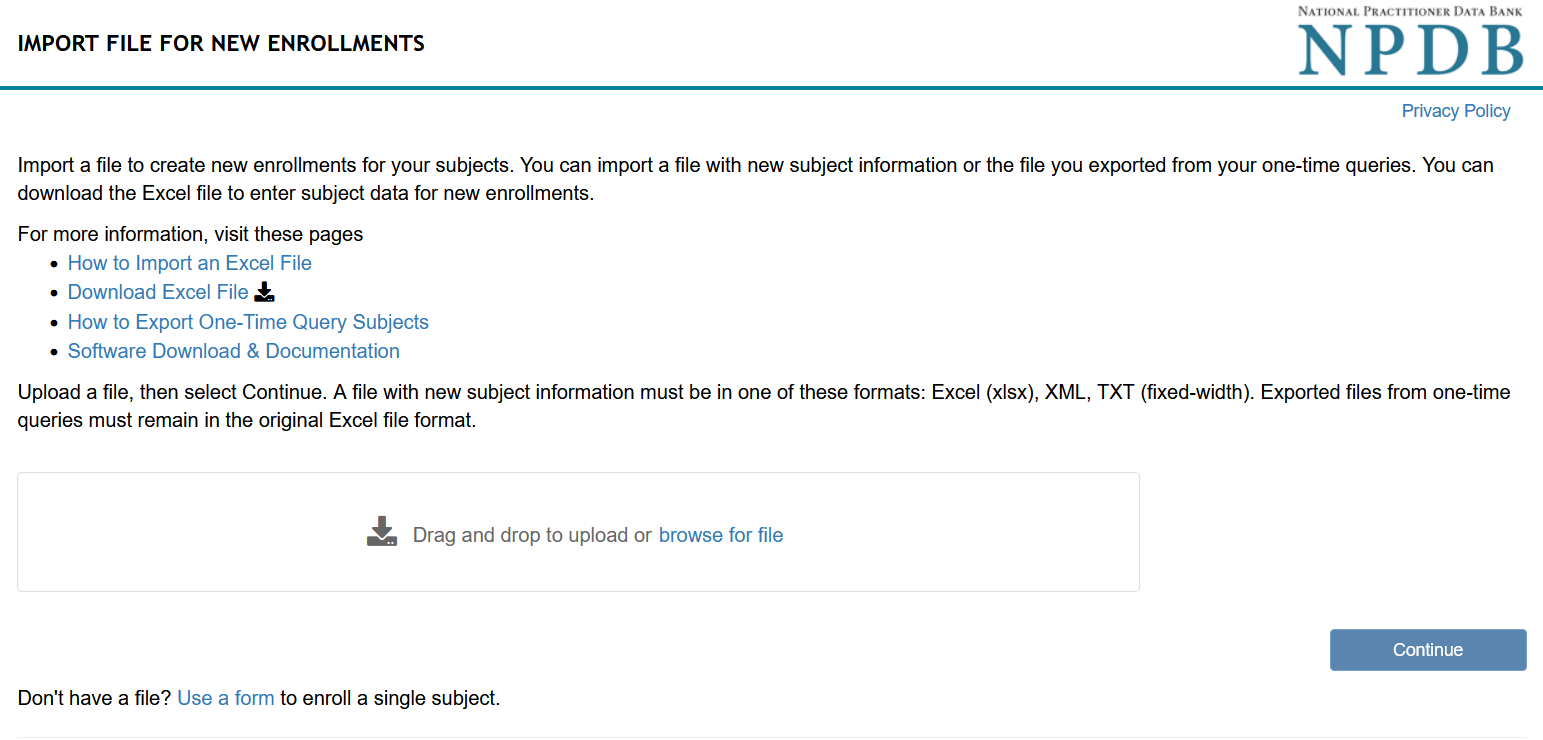
- On the Import File For New Enrollments page, drag and drop or select browse for file to upload the file to the page.
Note: When using the Excel format, your file must be saved with an .XLSX extension.Import File for New Enrollments
- Select Continue.
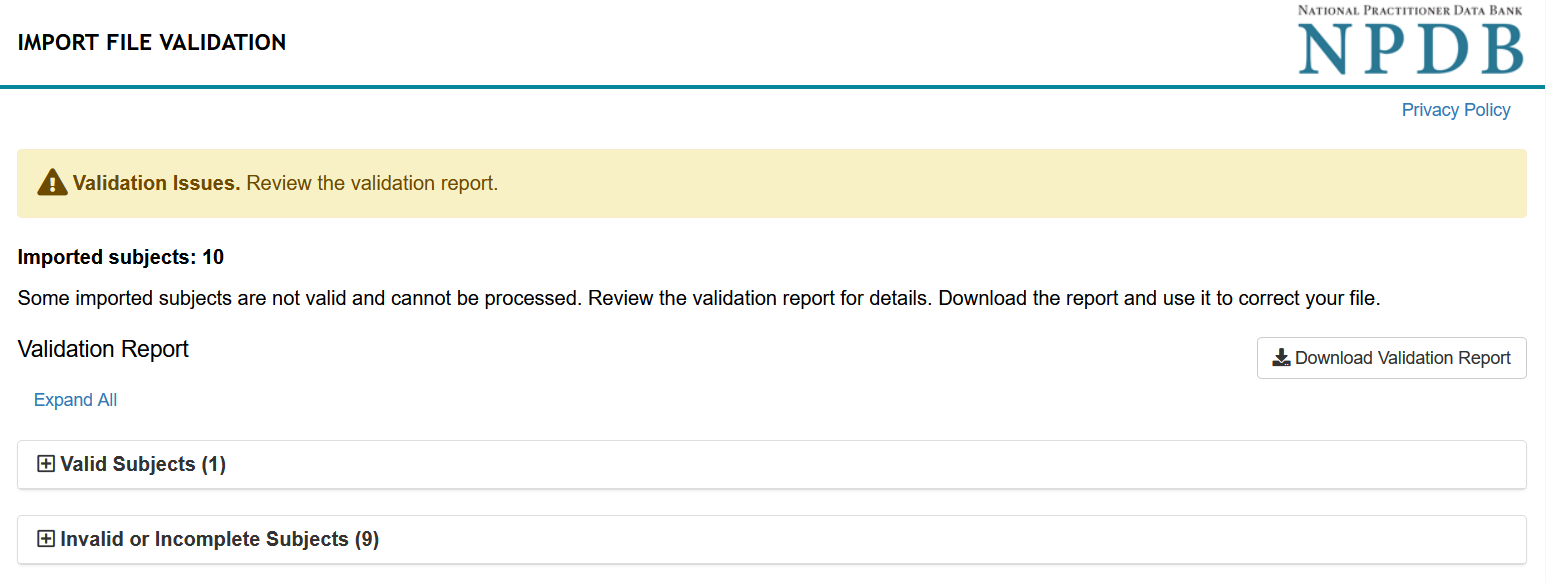
- On the Import File Validation page:
- Review the validation report for details on any invalid, incomplete, or duplicate subjects. Invalid subjects cannot be processed.
- Download the validation report and use it to correct your file and import again.
Import File Validation
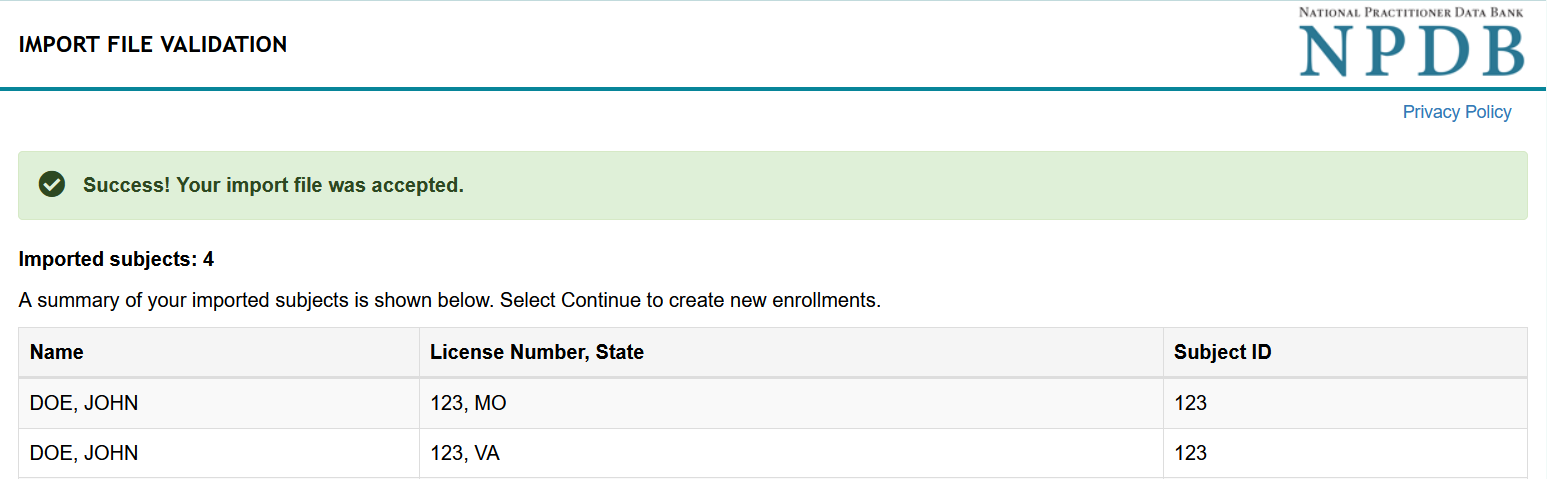
- Review a summary of your imported subjects when the file is successfully accepted . Select Continue.
Import File Validation
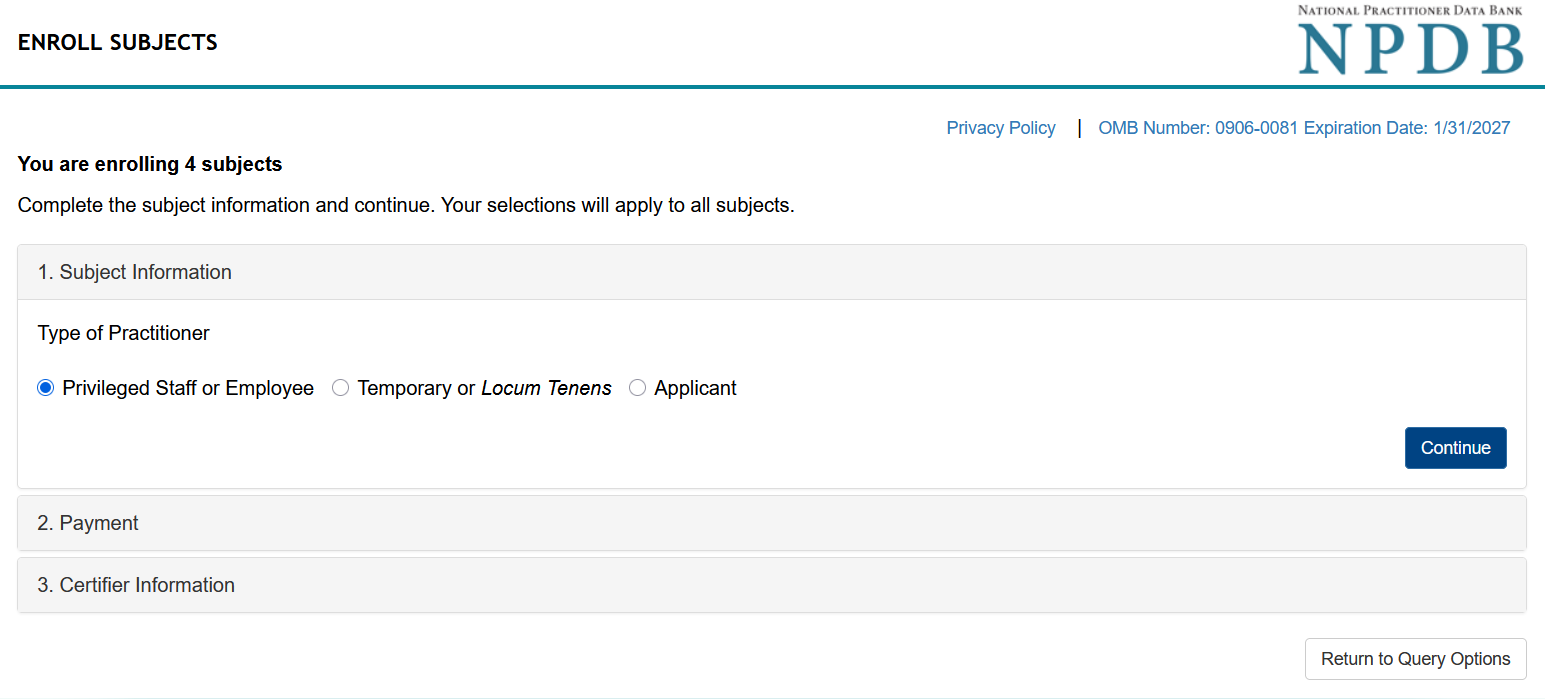
- Complete the subject information on the Enroll Subjects page and select Continue.
Note: Selections will apply to all subjectsEnroll Subjects
- Select your method of payment, complete the payment form, and select Continue.
- Verify your information is correct and complete the submitter certification.
- Select Submit to submit the enrollment.
Submit a bulk One-Time Query
- Sign in to the NPDB.
- From the Select an Option page, select Query, then select Import File for One-Time Query.
Select an Option
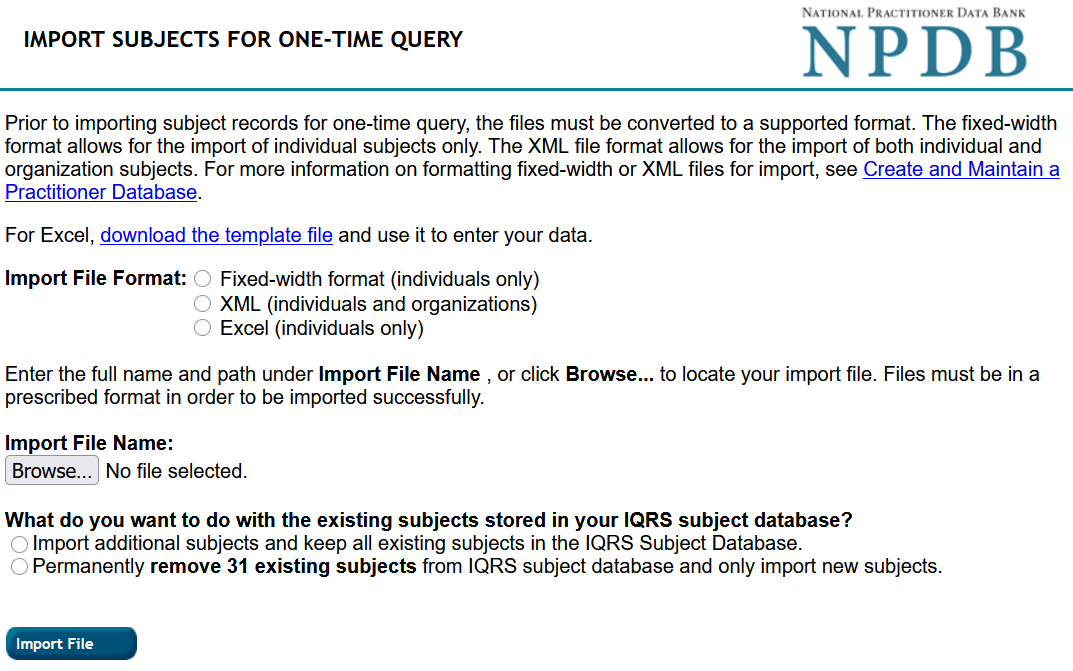
- On the Import Subjects For One-Time Query page, select the Excel import file format.
Import Subjects for One-Time Query
- Select the Choose File button, then select your Excel file to import.
Note: Your file must be saved with a .XLSX extension. - Select an option for your existing subjects. You can keep the existing subjects and add new subjects or delete the existing subjects and add the new ones.
- Select Import File.
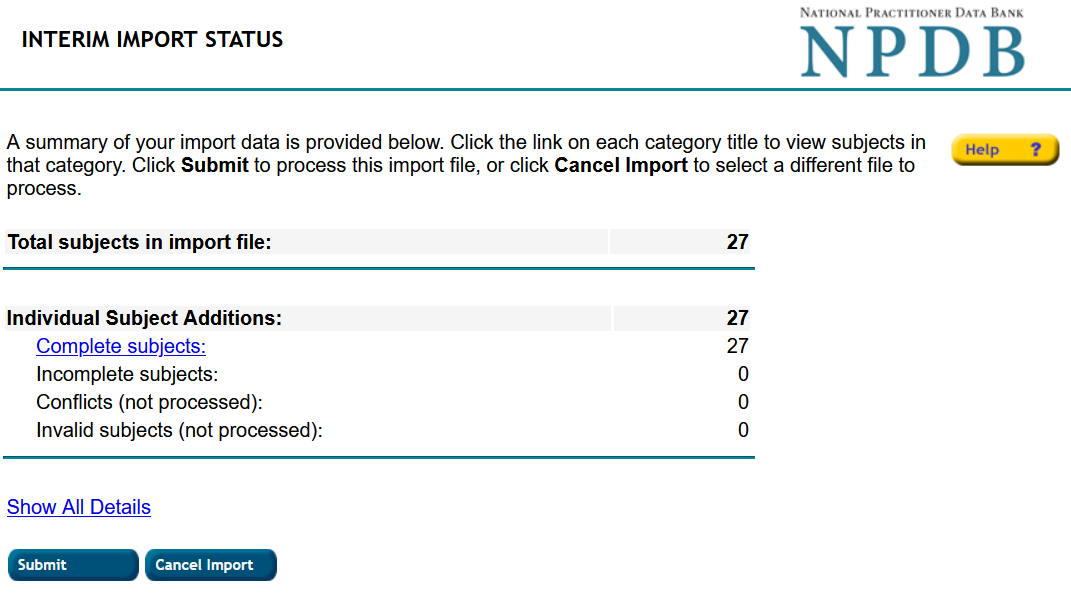
- Review the import data summary on the Interim Import Status page.
- Click the link on each category title (Complete, Incomplete, Conflicts, Invalid subjects) to view subjects in that category.
- Select Cancel Import to cancel and correct any Validation Warnings in your file.
- Select Submit to add the Complete and Incomplete subjects to the subject database
Interim Import Status
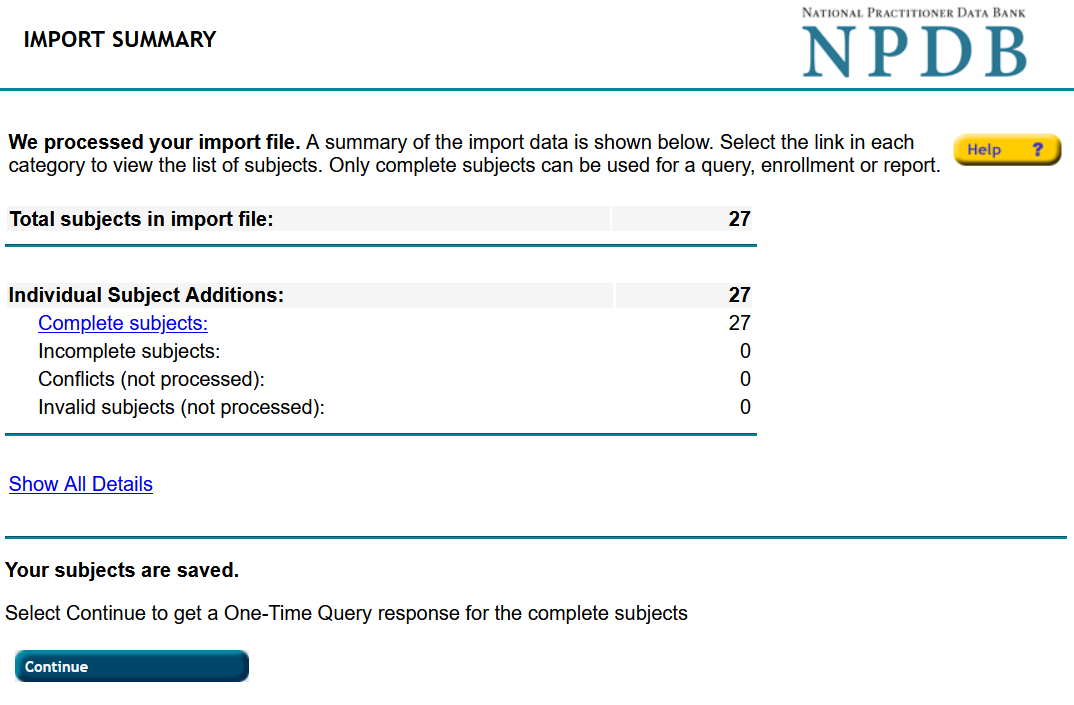
- Review the Import Summary page.
- All subjects must be complete to get a One-Time Query response. Select Continue.
- Select Return to Options and then Maintain Subject Database to complete any incomplete subjects.
Import Summary
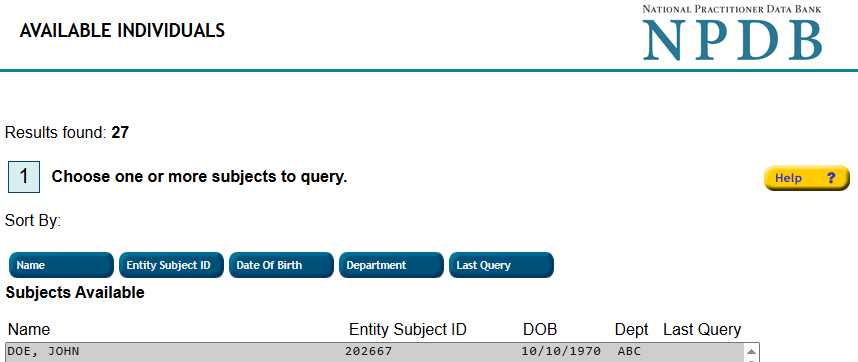
- Select your completed subjects to query on the Available Individuals page, and select Continue.
Available Individuals
- Select Continue to confirm the number of queries you mean to purchase.
- Select your method of payment, complete the payment form, and select Continue.
- Verify your information is correct and complete the submitter certification.
- Select Submit to NPDB to submit the query.
Submit subject database records to add, delete, or update
- Sign in to the NPDB.
- From the Select an Option page, select Query, then select Maintain Subject Database .
Select an Option
Maintain Subject Database

- Select Import File.
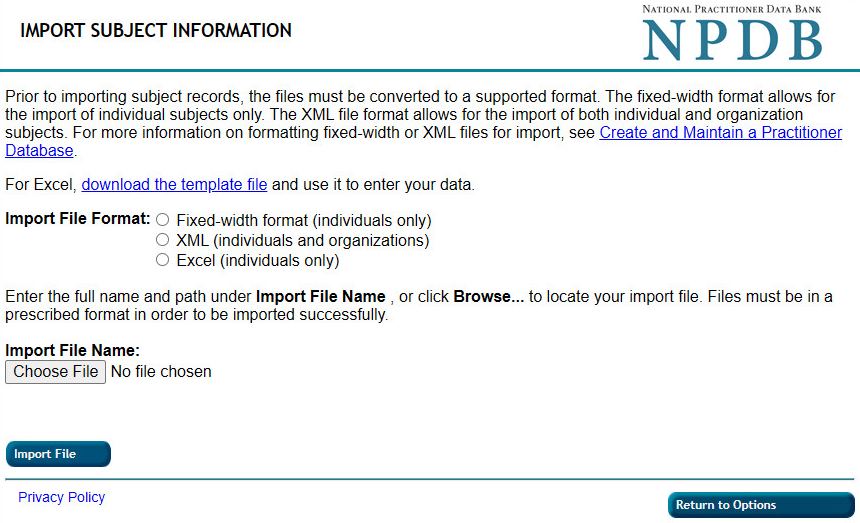
- On the Import Subject Information page, select the Excel import file format.
Import Subject Information
- Select the Choose File button, then select your Excel file to import.
Note: Your file must be saved with a .XLSX extension. - Select an option for your existing subjects. You can keep the existing subjects and add new subjects or delete the existing subjects and add the new ones.
- Select Import File.
- Review the import data summary on the Interim Import Status page.
- Click the link on each category title (Complete, Incomplete, Conflicts, Invalid subjects) to view subjects in that category.
- Select Cancel Import to cancel and correct any Validation Warnings in your file.
- Select Submit to add the Complete and Incomplete subjects to the subject database
Interim Import Status
- Review the results on the Import Summary page, then choose an option for the complete subjects.
- Enroll the subjects in Continuous Query
- Order a One-Time Query response for subjects
- Return to Query Options.
Import Summary
- Select Continue to process your selection.
- A confirmation is displayed if your file is successfully imported.
